Hi ladies and gentlemen,
it is time for yet another free step by step for you to enjoy on MV.
Enjoy a read through my brain while I was painting up a cool bust by Hera Models.
The bust itself is already in private collection, though I got to ship it soon and writing a step by step article is always a good chance to say goodbye to a figure that is sold and finds a new, good home.
I hope you enjoy and if you do, consider this:
_______________________________________________________________________________
You want to support Massive Voodoo?
If you like to support or say thanks the monkeys of Massive Voodoo in what they do, please feel invited to drop a jungle donation in their direction via paypal or check their miniatures they got on sale here.
_______________________________________________________________________________
INTRODUCTION
To be frank with you in here I got to say I love this bust.
It is a small bust that you can do quickly as it does not have too much different materials and details. You can do, but I realised with my approach, that it also can take long :D
There is the bigger version of this guy, dressed up like Viking with tons of detail and one day I want to paint him too, but this one was calling me more for a neat vision I had:
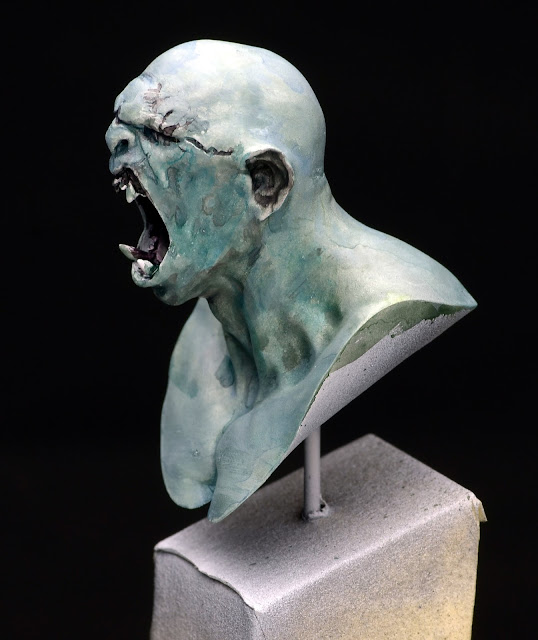
Not an Orc, not a strong Goblin, not a ghoul, more like a mixture between a ghoul and a vampire. I kind of called this "Strigoi", even I know the name stands for something else in terms of Vampire fluff, but I liked it for the vision I had in mind. Something cold, lifeless and a hunter in the night, so I started slapping colors on it via the brush, thinned with water and everything looks superrough and random. Shadow here and there to get my sketch of light source and color choices in this piece rather quick - my basic sketch of my visionon top of white primer:
Again it is quite hard to tell you exact color recipes I used here as I did not use any. I mainly mixed the colors I needed out of my primaries from Schmincke Primeacryl and black and white. I was using a strong tone wash in his mouth and around the eyes.
Looking super rough I already can feel my "Strigoi" thing dropping in. Looking at this sketch in the lightbox with the big camera it is obvious what I mean with a rough look:
Like being said already, for me it is more important to have a quick sketch of my idea and work my way there instead of following color recipes on different materials without seeing and understanding the overall vision.
What is crazy about this bust is that he is yelling at you all the time and from everywhere:
Allright, after my first basic sketch I used more white in my blueish pale mix and cleaned up all surfaces, but of course left shadows here and there. I also used a dark purple blue brown color that I have mixed to create random patterns of fouling and skin texture to this undead creature. With the same color I touched the tongue. Using the same color as a glaze I also placed it carefully around the eyes and ears.
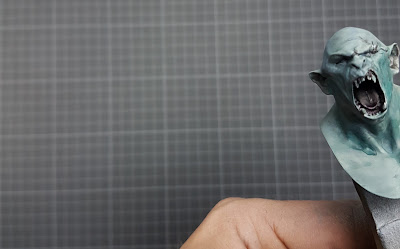
Used a pale blue bone color that I mixed myself to seperate the teeth from eachother by placing a basic color there and leaving darklines betweend them for a clearer seperation. Check back with my thumb to see the colors I used. Great feature, eh?
I am also protecting my high end Dino Pivato plinth I brought from last years Monte San Show with tape while going crzay on painting. Just as a side information.
The patterns where painted freehand. Mainly inspired by his scar on his left eye, placed with thicker paint, at random, overall to make the large areas more interesting. While highlighting I went for different volumes, but also played with texture where I felt it would look good.
Playful random patterns appeared on this undead beast ...
A quick photo from the light box again.
All looks a little brighter, but to be frank there was already a lot of white in my pale blue mix while doing this:
Such a character.
Allright, next step was cleaning up more, going back with some shadows and blue and purple/magenta tints in form of glazes. Check back with my thumb again to see the color I used and the grade of dillution. Increasing shadows, redifining sharp lines that define volumes, but also going for the same highlight color used as before to intensify areas with additional applications.
More definition in detail:
He gets alive...
uhm, I mean alive as an undead monstrum can get. Some of my recently placed highlights were placed as tiny or bigger strikes of thick paint. Powerful, emotional, characterful brushstrokes. Bam! Bam! Bam! Following the beauty of volumes under zenital light. At least this is what I would call it now as while painting I do not think about such things. I just paint.
Next step:
Increasing definition and more white in the mix of pale blue white already. Still not pure white. Also using a blue and purple glazes again to calm down too whitish highlights here and there. I would call this stage "more color" to it in terms of saturation, even I kind of messed up the neck area under the chin with too watery purple. No problem, will fix this on the go.
MORE MAGENTA!!!!
Magenta to the ears, even in patterns to demonstrate texture and uglyness of the undead ghoul flesh.
Tweaking a little bit more on some pure white final highlights to maximize the definition of his pale flesh I also placed him in my work in progress shelf to see how he looks under normal light conditions. Not under the strong daylight painting lamp.
Still not satisfied with his neck area, I worked on this a little more and also added some red glazes to the skin to make the mouth and eye area stand out even more. Using the airbrush to spray a blueish filter (a glaze) in through via lower angles.
I then removed the tape from the plinth to see how they match as the model was closing in to be finished.
Some final brushstrokes and tweaking here and there were done. Increasing a shadow here, being more precise and sharper in a highlight here and there, signing the model and calling it done. My vision fullfilled. You might see how important a clear vision of a paintjob is, if you are sure on what you want to see in the end you can follow it through to the point that satisfies you. Without a clear vision you'd paint material after material without an overall feeling for the whole piece.
Final photos:
More via Putty&Paint.
Keep on happy painting!
Roman
_______________________________________________________________________________
You want to support Massive Voodoo?
If you like to support or say thanks the monkeys of Massive Voodoo in what they do, please feel invited to drop a jungle donation in their direction via paypal or check their miniatures they got on sale here.
_______________________________________________________________________________


Post a Comment